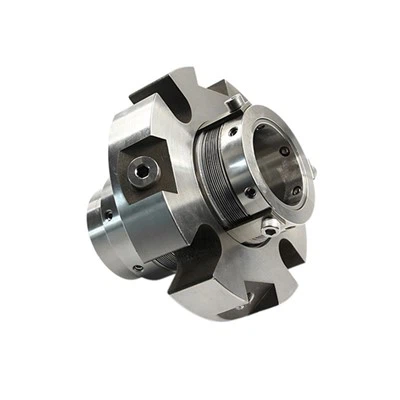
As a seasoned supplier of pump mechanical seals, I've witnessed firsthand the critical role these components play in the efficient operation of pumps across various industries. A mechanical seal is a device that helps join systems or mechanisms together by preventing leakage, containing pressure, or excluding contamination. Over time, due to normal wear and tear, improper installation, or harsh operating conditions, mechanical seals may fail, necessitating replacement. In this blog post, I'll walk you through the replacement procedures for a pump mechanical seal, offering insights and best practices to ensure a successful replacement.
Step 1: Preparation
Before diving into the replacement process, thorough preparation is key. This involves gathering the necessary tools and materials, shutting down the pump, and isolating it from the power source. Here's a detailed breakdown of the preparation steps:
Gather Tools and Materials
Ensure you have all the tools and materials required for the replacement. This typically includes a set of wrenches, screwdrivers, a seal installation tool, a torque wrench, a clean cloth, and the replacement mechanical seal. It's essential to use the correct size and type of tools to avoid damaging the seal or other pump components.
Shut Down the Pump
Turn off the pump and allow it to cool down completely. This is crucial to prevent burns and ensure your safety during the replacement process. Additionally, shutting down the pump helps prevent any unexpected movement or rotation of the pump shaft.
Isolate the Pump from the Power Source
Locate the electrical disconnect switch or breaker for the pump and turn it off. This step is essential to prevent accidental startup of the pump while you're working on it. Once the power is off, lock out and tag out the disconnect switch to ensure it remains off until the replacement is complete.
Drain the Pump
If the pump is filled with fluid, drain it completely before proceeding with the replacement. This helps prevent spills and makes it easier to access the mechanical seal. Use a suitable container to collect the drained fluid and dispose of it properly according to local regulations.
Step 2: Remove the Old Mechanical Seal
Once you've completed the preparation steps, it's time to remove the old mechanical seal. This involves disassembling the pump to access the seal and carefully removing it without damaging the pump components. Here's how to do it:
Remove the Pump Cover
Use the appropriate tools to remove the bolts or screws holding the pump cover in place. Carefully lift the cover off the pump and set it aside. Be sure to keep track of the bolts and any gaskets or O-rings that are removed.
Locate the Mechanical Seal
The mechanical seal is typically located between the pump impeller and the pump casing. It may be housed in a seal chamber or cartridge. Identify the location of the seal and any retaining clips, screws, or bolts that need to be removed to access it.
Remove the Retaining Hardware
Use the appropriate tools to remove any retaining clips, screws, or bolts that are holding the mechanical seal in place. Be careful not to damage the seal or the pump components while removing the hardware.
Remove the Old Seal
Once the retaining hardware is removed, carefully pull the old mechanical seal out of the pump. You may need to use a seal installation tool or a pair of pliers to grip the seal and pull it out. Be sure to handle the seal gently to avoid damaging it.
Inspect the Pump Components
While the old seal is removed, take the time to inspect the pump components for any signs of damage or wear. Check the pump shaft, impeller, and casing for scratches, nicks, or corrosion. If any damage is found, it may need to be repaired or replaced before installing the new seal.
Step 3: Clean and Prepare the Pump Components
After removing the old mechanical seal, it's important to clean and prepare the pump components before installing the new seal. This helps ensure a proper fit and prevents contamination of the seal. Here's how to do it:


Clean the Seal Chamber
Use a clean cloth and a suitable cleaning solution to clean the seal chamber thoroughly. Remove any dirt, debris, or old sealant from the chamber. Be sure to dry the chamber completely before installing the new seal.
Clean the Pump Shaft
Clean the pump shaft using a clean cloth and a suitable cleaning solution. Remove any dirt, debris, or old sealant from the shaft. Check the shaft for any signs of damage or wear, and if necessary, use a fine-grit sandpaper to smooth out any rough spots.
Apply Lubricant
Apply a thin layer of lubricant to the pump shaft and the seal faces. This helps ease the installation of the new seal and prevents damage to the seal faces during installation. Use a lubricant that is compatible with the seal material and the fluid being pumped.
Step 4: Install the New Mechanical Seal
Once the pump components are clean and prepared, it's time to install the new mechanical seal. This involves carefully positioning the seal in the pump and securing it in place. Here's how to do it:
Select the Correct Seal
Ensure you have the correct size and type of mechanical seal for your pump. Refer to the pump manufacturer's specifications or consult with a seal expert if you're unsure. Using the wrong seal can lead to premature failure and costly repairs.
Position the Seal
Carefully position the new mechanical seal in the seal chamber. Make sure the seal is properly aligned with the pump shaft and the seal faces are in contact with each other. Use a seal installation tool or a pair of pliers to help position the seal if necessary.
Install the Retaining Hardware
Once the seal is in place, install the retaining clips, screws, or bolts that hold the seal in place. Tighten the hardware to the manufacturer's recommended torque specifications using a torque wrench. Over-tightening the hardware can damage the seal or the pump components, while under-tightening can cause leakage.
Reassemble the Pump
After the new seal is installed, reassemble the pump by replacing the pump cover and tightening the bolts or screws. Make sure the cover is properly aligned and seated to prevent leakage.
Step 5: Test the Pump
Once the new mechanical seal is installed and the pump is reassembled, it's important to test the pump to ensure it's operating properly. This involves filling the pump with fluid, priming it, and starting it up. Here's how to do it:
Fill the Pump with Fluid
Fill the pump with the fluid being pumped. Make sure the pump is completely filled and there are no air pockets.
Prime the Pump
If the pump requires priming, follow the manufacturer's instructions to prime it. Priming helps remove any air from the pump and ensures proper operation.
Start the Pump
Turn on the power to the pump and start it up. Monitor the pump for any signs of leakage, unusual noise, or vibration. If any issues are detected, shut down the pump immediately and investigate the cause.
Check the Seal Performance
After the pump has been running for a few minutes, check the seal performance. Look for any signs of leakage around the seal. If there is any leakage, it may indicate a problem with the seal installation or the pump components.
Step 6: Monitor and Maintain the Pump
Once the pump is operating properly, it's important to monitor and maintain it regularly to ensure the long-term performance of the mechanical seal. This involves checking the seal for leakage, monitoring the pump's operating parameters, and performing routine maintenance tasks. Here are some tips for monitoring and maintaining the pump:
Check the Seal for Leakage
Regularly check the mechanical seal for any signs of leakage. Look for drips, puddles, or wet spots around the seal. If any leakage is detected, it should be addressed immediately to prevent further damage to the pump and the seal.
Monitor the Pump's Operating Parameters
Monitor the pump's operating parameters, such as pressure, temperature, and flow rate. Any significant changes in these parameters may indicate a problem with the pump or the mechanical seal.
Perform Routine Maintenance Tasks
Perform routine maintenance tasks, such as lubricating the pump bearings, checking the alignment of the pump and motor, and replacing the pump filters. Regular maintenance helps prevent premature failure of the mechanical seal and other pump components.
Conclusion
Replacing a pump mechanical seal is a critical maintenance task that requires careful preparation, proper installation, and regular monitoring. By following the replacement procedures outlined in this blog post, you can ensure a successful replacement and extend the life of your pump. At our company, we offer a wide range of high-quality mechanical seals, including the MOR Type8, MOR M32 Sewage Pump Mechanical Seal, and MOR 208. If you have any questions or need assistance with your pump mechanical seal replacement, please don't hesitate to contact us. We're here to help you keep your pumps running smoothly.
References
- Pump Manufacturer's Manuals
- Mechanical Seal Manufacturer's Technical Documents
- Industry Standards and Best Practices