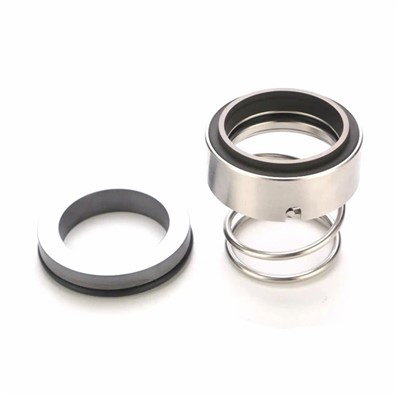
Hey there! As a supplier of single coil mechanical seals, I often get asked about the replacement steps for these seals. So, I thought I'd put together this blog post to walk you through the process.
Why Replace a Single Coil Mechanical Seal?
Before we dive into the replacement steps, let's quickly talk about why you might need to replace a single coil mechanical seal. Over time, these seals can wear out due to friction, chemical exposure, or just general use. When a seal starts to fail, you might notice leaks, reduced performance, or increased energy consumption. Replacing the seal in a timely manner can prevent more serious problems down the line and keep your equipment running smoothly.
Step 1: Gather Your Tools and Materials
The first thing you need to do is gather all the tools and materials you'll need for the replacement. Here's a basic list:
- New single coil mechanical seal (make sure it's the right size and type for your equipment)
- Wrenches and sockets
- Screwdrivers
- Cleaning supplies (like a degreaser and a clean cloth)
- Safety equipment (gloves, goggles, etc.)
Step 2: Shut Down the Equipment
Safety first! Before you start working on the equipment, make sure it's completely shut down and disconnected from any power sources. This will prevent any accidental starts and keep you safe during the replacement process.
Step 3: Remove the Old Seal
Once the equipment is shut down, it's time to remove the old seal. Here's how:
- Locate the seal housing. This is usually a metal or plastic casing that holds the seal in place.
- Use your wrenches and sockets to loosen and remove the bolts or screws that hold the housing in place.
- Carefully remove the housing and set it aside.
- Take out the old seal from the housing. You might need to use a screwdriver or other tool to pry it out.
Step 4: Clean the Seal Housing
Before you install the new seal, it's important to clean the seal housing thoroughly. Use a degreaser and a clean cloth to remove any dirt, debris, or old sealant from the housing. Make sure the housing is completely dry before you proceed.
Step 5: Install the New Seal
Now it's time to install the new seal. Here's how:
- Apply a small amount of lubricant to the seal faces. This will help the seal seat properly and prevent damage during installation.
- Carefully place the new seal into the housing, making sure it's centered and aligned correctly.
- Reattach the housing to the equipment, using the bolts or screws you removed earlier. Make sure the housing is tightened securely, but don't over-tighten it.
Step 6: Test the Equipment
Once the new seal is installed, it's time to test the equipment. Reconnect the power source and start the equipment. Check for any leaks or other issues. If everything looks good, let the equipment run for a few minutes to make sure the seal is working properly.
Step 7: Monitor the Seal
After the replacement, it's important to monitor the seal for any signs of problems. Check for leaks, unusual noises, or changes in performance. If you notice any issues, stop the equipment immediately and contact a professional for help.


Recommended Products
If you're in the market for a new single coil mechanical seal, we have some great options for you. Check out these products:
- John Crane 112 Replacement Unbalanced mechanical seal: This is a high-quality replacement seal that's designed to fit a wide range of equipment.
- MOR SEV High Speed Mechanical Seal for Waste Water Pump: If you're looking for a seal that can handle high speeds and harsh environments, this is a great option.
- HJ92N Mechanical Seal Replacement for Pump: This seal is specifically designed for pumps and offers excellent performance and reliability.
Contact Us for Purchasing
If you're interested in purchasing a single coil mechanical seal or have any questions about the replacement process, don't hesitate to reach out. We're here to help you find the right seal for your needs and provide you with the support you need to get the job done right.
References
- Mechanical Seals Handbook, by John A. Nyberg
- Sealing Technology, by David A. Dowson
That's it for this blog post. I hope you found it helpful. If you have any questions or comments, feel free to leave them below. Thanks for reading!