


As a sewage pump seal supplier, I understand the importance of maintaining and replacing sewage pump seals to ensure the proper functioning of sewage pumps. A faulty seal can lead to leaks, reduced pump efficiency, and even system failures. In this blog post, I will guide you through the process of replacing a sewage pump seal, providing you with the necessary steps and tips to get the job done right.

Understanding the Sewage Pump Seal
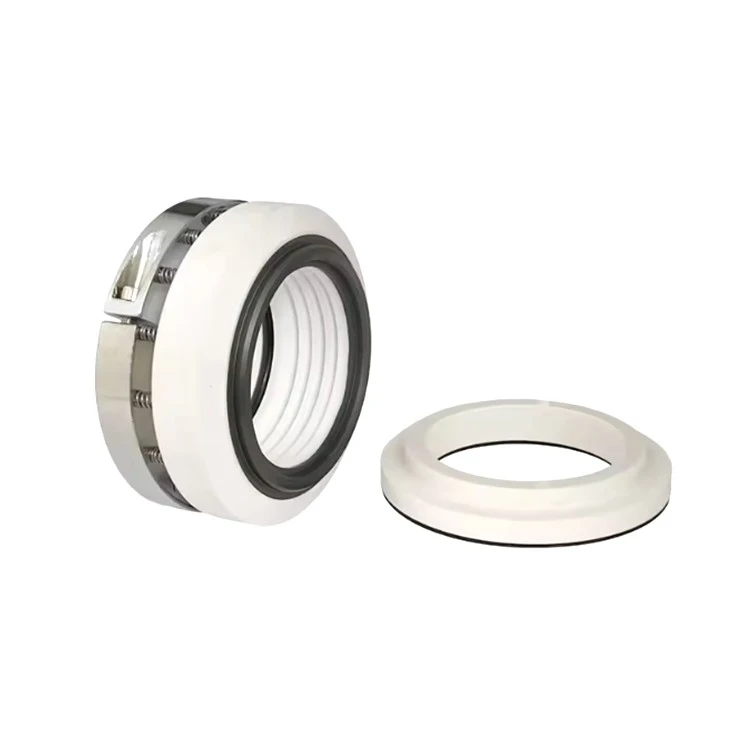
Before we dive into the replacement process, it's essential to understand what a sewage pump seal is and its role in the pump system. A sewage pump seal is a critical component that prevents the leakage of sewage and other fluids from the pump. It is typically located between the pump housing and the motor shaft, creating a barrier that keeps the fluid inside the pump and prevents it from seeping into the motor or the surrounding environment.
There are different types of sewage pump seals available in the market, including mechanical seals and gland packing seals. Mechanical seals are the most common type used in sewage pumps due to their superior sealing performance and durability. They consist of two flat faces that are pressed together by a spring, creating a tight seal that prevents fluid leakage.
Signs that Your Sewage Pump Seal Needs Replacement
Over time, sewage pump seals can wear out or become damaged due to various factors, such as corrosion, abrasion, or improper installation. Here are some signs that your sewage pump seal may need replacement:
- Leakage: If you notice any signs of fluid leakage around the pump, it could be a clear indication that the seal is damaged or worn out.
- Reduced Pump Efficiency: A faulty seal can cause a decrease in pump efficiency, resulting in reduced flow rates and increased energy consumption.
- Noise or Vibration: Excessive noise or vibration during pump operation could be a sign of a misaligned or damaged seal.
- Overheating: If the pump motor is overheating, it could be due to a leaky seal, which allows fluid to enter the motor and cause damage.
If you notice any of these signs, it's important to replace the sewage pump seal as soon as possible to prevent further damage to the pump and the surrounding system.
Tools and Materials Needed
Before you start replacing the sewage pump seal, you will need to gather the following tools and materials:
- Wrenches and Socket Set: To remove and install the pump components.
- Screwdriver: To remove any screws or bolts holding the pump housing together.
- Seal Puller: To remove the old seal from the pump.
- New Seal: Make sure to choose the right seal for your pump model. You can find a wide range of sewage pump seals on our website, including MOR112, MOR WB2/10T/10R PTFE Bellow Mechanical Seal, and 212 Teflon Bellow Mechanical Seal.
- Cleaning Solvent: To clean the pump components before installing the new seal.
- Lubricant: To lubricate the new seal before installation.
Step-by-Step Guide to Replacing a Sewage Pump Seal
Step 1: Disconnect the Power
Before you start working on the pump, make sure to disconnect the power supply to prevent any electrical hazards. This can be done by turning off the circuit breaker or unplugging the pump from the power outlet.
Step 2: Drain the Pump
Next, you will need to drain the pump to remove any remaining fluid. This can be done by opening the drain valve or removing the drain plug located at the bottom of the pump.
Step 3: Remove the Pump Housing
Using a wrench or socket set, remove the bolts or screws holding the pump housing together. Carefully lift the housing off the pump to expose the internal components.
Step 4: Remove the Old Seal
Once the pump housing is removed, you will be able to access the old seal. Use a seal puller to carefully remove the old seal from the pump. Be careful not to damage the pump components during this process.
Step 5: Clean the Pump Components
After removing the old seal, use a cleaning solvent to clean the pump components thoroughly. This will help remove any dirt, debris, or old sealant that may be present. Make sure to dry the components completely before proceeding to the next step.
Step 6: Install the New Seal
Apply a thin layer of lubricant to the new seal to make it easier to install. Carefully place the new seal into the pump, making sure it is properly aligned with the pump housing. Use a seal installer or a flat surface to press the seal into place until it is fully seated.
Step 7: Reassemble the Pump
Once the new seal is installed, carefully reassemble the pump by placing the housing back on the pump and tightening the bolts or screws. Make sure to tighten the bolts evenly to prevent any leaks.
Step 8: Fill the Pump with Fluid
After reassembling the pump, fill it with fluid to prime the pump. This can be done by pouring water into the pump through the inlet or using a priming pump.
Step 9: Reconnect the Power
Once the pump is filled with fluid, reconnect the power supply to the pump. Turn on the power and check for any leaks or abnormal noises. If everything looks and sounds normal, the pump is ready to use.
Tips for a Successful Seal Replacement
- Follow the Manufacturer's Instructions: Always refer to the manufacturer's instructions when replacing a sewage pump seal. This will ensure that you are using the correct seal and following the proper installation procedures.
- Use the Right Tools: Make sure to use the right tools for the job to prevent any damage to the pump components. Using the wrong tools can also make the replacement process more difficult and time-consuming.
- Inspect the Pump Components: Before installing the new seal, inspect the pump components for any signs of damage or wear. Replace any damaged components to ensure the long-term performance of the pump.
- Lubricate the Seal: Applying a thin layer of lubricant to the new seal before installation will make it easier to install and help prevent damage to the seal.
- Test the Pump: After replacing the seal, test the pump to make sure it is working properly. Check for any leaks, abnormal noises, or vibrations. If you notice any issues, stop the pump immediately and troubleshoot the problem.
Conclusion
Replacing a sewage pump seal is a relatively simple process that can be done by anyone with basic mechanical skills. By following the steps outlined in this blog post and using the right tools and materials, you can ensure a successful seal replacement and keep your sewage pump running smoothly.
If you have any questions or need further assistance with replacing a sewage pump seal, please feel free to contact us. As a leading sewage pump seal supplier, we offer a wide range of high-quality seals and expert advice to help you find the right solution for your needs. Whether you need a MOR112, MOR WB2/10T/10R PTFE Bellow Mechanical Seal, or 212 Teflon Bellow Mechanical Seal, we have you covered. Contact us today to discuss your requirements and start the procurement process.
References
- "Sewage Pump Maintenance Guide." Pump Industry Magazine.
- "Mechanical Seals: A Comprehensive Guide." Sealing Technology Journal.


